By Donna Mcghie – Powertex Tutor and Trainer
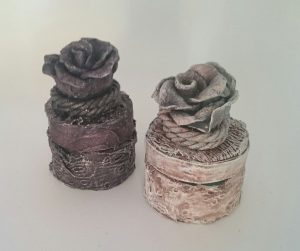
Follow my simple step by step to create your own upcycled pot
Like most of us, my creativity stash is becoming sparser and sparser during this period of lockdown.
However, what I do have lots of is old cosmetic pots. I find that it is around Springtime that I start to run out of all the posh stuff I get gifted as Christmas presents.
So the good news is, providing you have just a small amount of Powertex, an old pot, and some scraps of fabric, there is still lots of scope for getting those creativity juices flowing.
In this project I also used some Powertex Stone Art Powder, but don’t worry if you don’t have this at the moment, you can use any air drying clay available.
If you don’t have any clay again, no worries, just stick a pretty embellishment on the top.
Creativity will always find a way.
Materials List:
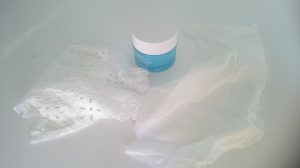
It’s amazing what can be achieved with very little
- Powertex Fabric Hardener
- An empty cosmetic pot
- Stone Art Powder (if available)
- Scraps of natural fibre material
- Powertex Pigments (if none available Powertex works well with all pigments and paints)
- Powertex Easy Varnish (again if none available, simply use another type of paint)
- Any embellishments that are available (I used a piece of old string)
STEP 1:

I cut round slightly wider than the width of the lid
Draw around the shape of the lid of your pot on some fabric.
Cut around slightly wider than your pen mark. This gives some flexibility if you have a ‘thirsty’ fabric, or want to create some interesting creases in your design.
STEP 2:
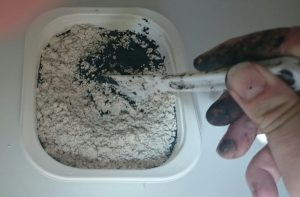
You will need roughly equal quantities of Powertex and Stone Art Powder
If you are using Stone Art, mix roughly equal amounts of Stone Art Powder and Powertex together.
Add the Stone Art gradually, gently mixing it in until you start to form a doughy substance. Your clay is ready when you can hold it as a ball in your hands and it doesn’t stick to them.
STEP 3:
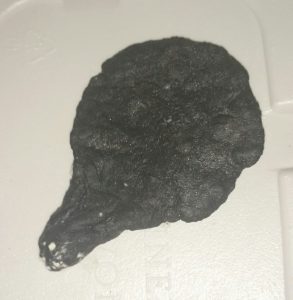
Your petal shape doesn’t have to be perfect, I prefer irregular petals
Break of sections of your clay and form it into petal shapes.
It is a good idea to have shapes of varying sizes, from smaller and working up to larger.
I like to make the ends of the petals really thin, and fold them back a bit once I form the rose itself.
The quantity of petals you make depends on how wide you want your rose to be.
I would suggest using odd numbers though, for some reason this works better.
STEP 4:
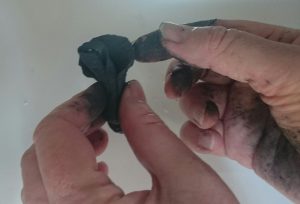
Work from the smaller petals out to larger ones
Picking a smaller petal carefully curl it round on itself.
Curl the next petal around this centre piece, taking care to gently ease the edges out if you want an unfurling effect.
Continue doing this until you have your completed rose.
I then use a knife to slice off the bottom so that the rose does not sit up too proudly from my lid.
Put it to one side to dry.
STEP 5:

Good old masking tape will help the Powertex adhere
Whilst your rose is drying off, you can start to decorate the pot.
Put some masking tape around the edges and the lid.
This will give the Powertex something to adhere to.
STEP 7:
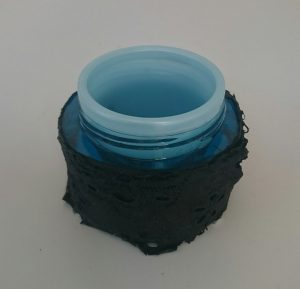
You will get the best results with a textured fabric
Pour a small amount of Powertex Fabric Hardener into a tub.
Cut small strips of fabric to fit around your pot sides.
Soak the fabric in the Powertex, and wring it out thoroughly.
Place the fabric around the edge of the pot. Be sure not to go so high with this that the lid won’t fit on properly.
Put aside to dry.
STEP 8:
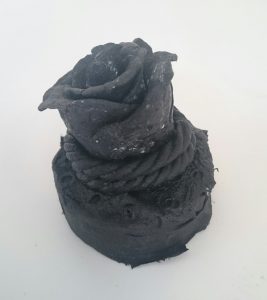
I placed some string around the base of the rose for added interest
Repeat the same process with the sides of the lid.
Soak your circle of fabric and place that on the top of the lid.
Now add your rose. I find dipping the base of the rose in the Powertex will help it to adhere.
Add any other embellishments of your choice. If your lacking in embellishments, remember, creativity will find a way.
I soaked a bit of rope in the Powertex and wound it around the base of the rose as I like this effect.
Put aside to dry.
STEP 9:
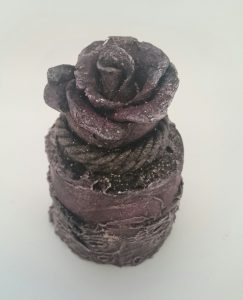
Dry brushing brings the whole project to life
Once the material is dry you can start to dry brush your whole design.
I used Powertex Pigments and Easy Varnish, but if you don’t have any Powertex works well with all other paints, use that creativity.
If you are unsure how to drybrush I have instructions on one of my previous blogs here
I hope you find this tutorial inspiring and can find a pot to experiment with.
You can use any colour Powertex you have at home at this time, and pretty much any embellishments that take your fancy.
Below is another pot I did using a lighter Powertex – I have added bister to this one as I think it helps with the vintage look I was aiming for.
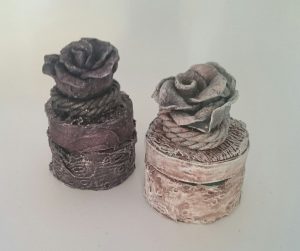
I sprayed the lighter pot with bister as it helped achieve the vintage look
I hope you have fun playing with Powertex. If you would like to post your makes then I would love to see them both on my facebook page, and also over at the Powertex Page The Powertex Studio.
Take care everyone, please stay as safe and well as possible, and look forward to seeing you soon.
Donna