It is so easy to create something beautiful like this out of an old bottle
In this easy step by step powertex project I will talk you through everything you need to know to upcycle those old bottles we all have lying around.
What you will need:
An old bottle to upcycle
Fabric (a natural fabric such as cotton is best)
Masking tape
Rubber Gloves
A small container to pour your powertex into
Powertex Fabric Hardener
Powertex Pigments
Powertex Easy Varnish
A flat Brush
Paper Towel
Step by Step Instructions:
1) Whether your bottle is glass or plastic, it is a good idea to put some masking tape over if first of all, so that the powertex has something to cling onto.
You don’t need to cover the whole bottle, just put enough on so that the powertex will stick

I seldom cover the whole bottle, just enough to make sure the powertex can cling onto something
2) Now pour out some powertex hardener in the colour of your choice into a container.
A good tip is to only pour out a little at a time, as the powertex will not be as weather resistant, or harden as well once it is tipped back into the original container.
If I do have some left over (which is quite often as I am rubbish at guestimates, I simply cover it with something so it is airtight, and it will keep for around a week)
3) Now the fun part. Don those gloves, and gently dip your fabric into the hardener.
If you are new to powertex I recommend using small sections at a time until you are used to the process. You want to cover all of your material, but not have it soaking wet, so be sure to wring it out thoroughly.
You are aiming for somethng like this if you stretch it out

I chose to use black, as I think it makes the pigments zing once you add them
4) Now you can start to drape your fabric over your bottle. The trick is to create lots of textures and folds, as these will come to life once you dry brush at the end.
Now is also the time to add those embellishments as they will stick into the wet powertex. I sometimes put them on without soaking them in powertex, so that their true colours show through, or I sometimes soak them in powertex before adding them.
It really depends on the look you want to go for. At this stage your bottle will look something like this:
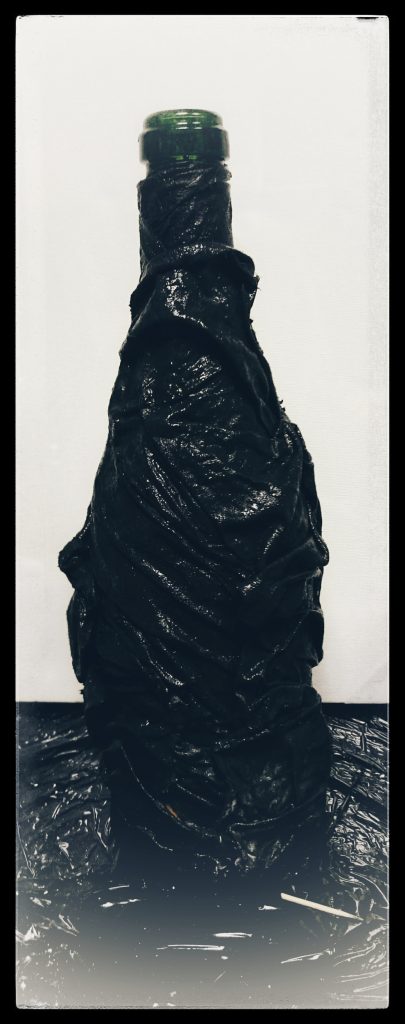
At this stage your bottle will look something like this
5) Once you are happy with your design, set it aside to dry thoroughly. I like to leave overnight, but you can speed up the process by using a hair dryer.
6) Once the fabric feels hard to the touch, you are ready to dry brush. This is my favourite part of the process, as suddenly your project starts to somehow come to life.
Dry brushing is very easy once you have the knack of it, but there is a definite knack, so I have broken it down into small steps, and also done a short video which will hopefully help:
Dip a good quality flat brush into a small amount of the powertex easy varnish.
Now dip the same brush into a small amount of your chosen pigment colour.
Now, wipe that same brush off on a piece of paper towel. I know it seems counter intuitive to load up and then brush off, but you just want to add subtle highlights, and if it is too loaded with varnish and pigment, your colouring runs the risk of looking heavy and somehow clunky.
Now simply and very gently, sweep your brush over those creases in the fabric you created earlier. You are aiming to just pick out the highlights, not cover every single piece of fabric.
Carry on gently building up your layers of chosen colours, until you are happy with your design.
And voila!! a beautiful upcycled powertex bottle to be proud of

I used some ornamental flowers, and some junk jewellery to decorate my bottle